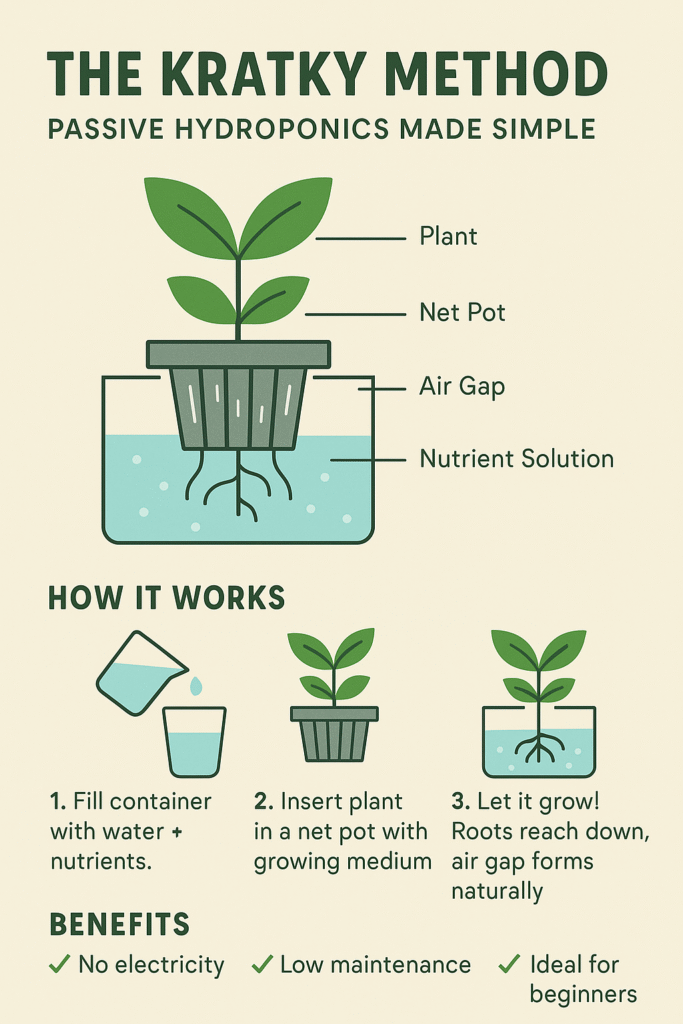
No pumps, no fuss—just water, nutrients, and fresh food.
If you’ve ever wanted to grow your own herbs or leafy greens indoors but felt overwhelmed by the equipment or setup, the Kratky method might be your perfect entry point into hydroponics.
It’s simple, low-maintenance, and doesn’t require electricity—making it ideal for beginners, small spaces, or even off-grid growing.
In this article, we’ll cover:
- What the Kratky method is
- How it works
- What you need to get started
- What plants grow best
- Tips for success
What Is the Kratky Method?
The Kratky method is a passive hydroponic system developed by Dr. Bernard Kratky at the University of Hawaii. Unlike other hydroponic systems, it requires:
- No pumps
- No electricity
- No moving parts
Plants grow in a container filled with a nutrient-rich water solution. As the plant consumes the water, the water level drops, exposing the roots to air—which gives them the oxygen they need. It’s a natural self-regulating system.
Think of it as the “set it and forget it” approach to hydroponics.

What You’ll Need
One of the best things about the Kratky method is how low-cost and DIY-friendly it is. You can start with materials you probably already have at home.
Basic Kratky Setup:
- Container with a lid (like a mason jar, plastic tote, or food-grade bucket)
- Net pot (or a small cup with holes in the bottom)
- Growing medium (like clay pebbles, rockwool, or coco coir)
- Hydroponic nutrient solution
- Seeds or seedlings
- Filtered or dechlorinated water
- Light source (sunlight or a grow light)
That’s it!
How to Set Up a Kratky System (Step-by-Step)
1. Prepare Your Container: Clean your jar or container thoroughly. The size will depend on what you’re growing. A mason jar works great for herbs, while larger leafy greens may need more room.
2. Cut a Hole in the Lid: The net cup should fit snugly in the lid so that the bottom of the cup hangs about 1 inch into the water. If using a DIY cup, poke drainage holes in the bottom.
3. Mix the Nutrient Solution: Follow the instructions on your hydroponic nutrients to mix the correct amount with water. Pour it into the container, leaving about an inch of space between the water and the cup.
4. Add the Plant: Place your seeds or seedling (with clean roots) into the growing medium inside the net pot. Place the pot into the lid so it just touches the water.
5. Set It in the Light: Place your setup in a sunny windowsill or under a grow light for 12–16 hours per day.
6. Watch It Grow: As the plant grows, it will use water and nutrients. The water level will drop naturally, creating an air gap. Don’t refill the water—this gap is important for root oxygenation.
Maintenance & Tips
- Check occasionally to make sure the roots aren’t completely dry.
- Avoid light exposure to the water (use opaque containers or wrap jars in foil) to prevent algae growth.
- Use clean water and follow nutrient instructions carefully.
- No bubbling or circulation needed—the system is 100% passive.
Best Plants for the Kratky Method
The Kratky method works best for fast-growing, compact plants: Lettuce (butterhead, romaine, leaf), Spinach, Bok choy, Basil, Cilantro, Mint, Arugula, and Swiss chard.
Avoid growing large fruiting plants (like tomatoes or peppers) unless you have a deep container and advanced setup.
Why I Love It
- No electricity
- Ultra-low maintenance
- Perfect for windowsills and small spaces
- Great for classrooms, beginners, and busy people
- Fresh, homegrown greens year-round
Final Thoughts
If you’re curious about hydroponics but don’t want to invest in complex gear, the Kratky method is the easiest way to get started. It’s low-tech, reliable, and surprisingly productive.
With just a jar, some water, and a little light, you’ll be harvesting fresh herbs and greens in a matter of weeks—right from your countertop.